Vacuum leaks are one of the most common causes of rough idle, poor fuel economy, and engine performance issues.
Knowing how to detect a vacuum leak safely can save you time, money, and frustration.
Often, a vacuum leak makes an audible hissing sound, which makes it easy to find. But, other times, you won’t hear anything at all.
Thats why, many shops use special costly equipment, for Vacuum Leak Detection.
What Is a Vacuum Leak?
It occurs when unmetered air enters the engine after the mass airflow sensor (MAF) or throttle body. This disrupts the air-fuel mixture, usually causing the engine to run lean.
Common Symptoms of a Vacuum Leak
If your engine has a leak, you may notice:
- Rough or unstable idle
- Increased fuel consumption
- Engine misfires
- Stalling, especially at idle
- Hesitation during acceleration
- Check engine light (CEL) (often with lean codes like P0171 or P0174)
Start With a Visual Inspection For Vacuum Leak Detection
Before using any tools, perform a thorough visual check under the hood.
Look for:
- Cracked, brittle, or disconnected vacuum hoses
- Loose clamps or fittings
- Damaged intake tubing (especially between the air filter and throttle body)
- Broken plastic connectors or vacuum tees
Pay close attention to common failure areas such as the (PCV) system, brake booster hose, and intake ducting.
Safe Methods to Detect Vacuum Leaks
1. Smoke Testing (Recommended)
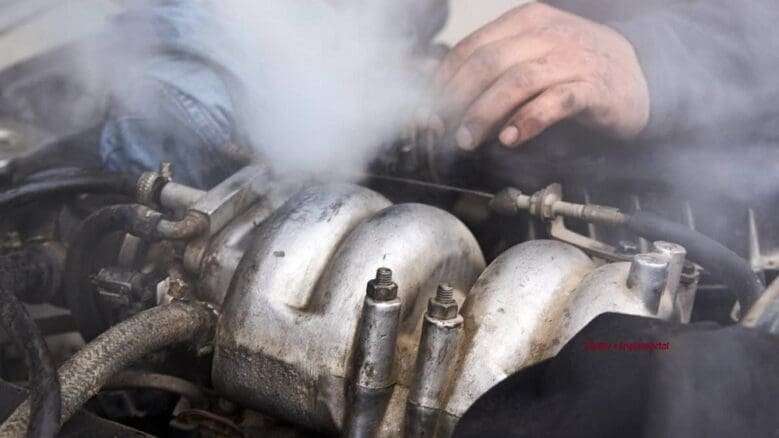
A smoke test is the most reliable and safest method.
How it works:
Smoke is introduced into the intake system using a smoke machine. Any leaks will allow smoke to escape, making them easy to spot.
Advantages:
- Highly accurate
- No risk of fire or component damage
- Can detect even very small vacuum leaks
2. Low-Pressure Air and Soapy Water
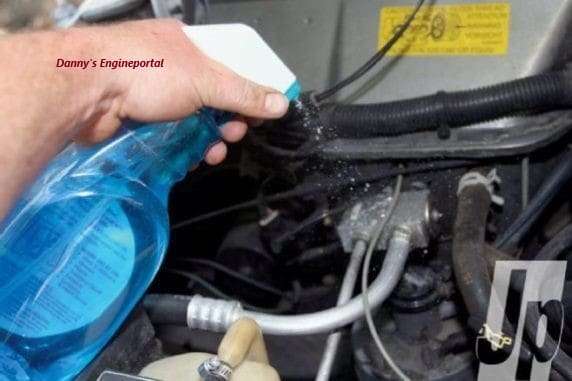
This method can be effective if done carefully.
How to do it:
Introduce low-pressure air (no more than 1–3 PSI) into the intake system. Spray soapy water on hoses, joints, and connections. Watch for bubbles forming, which indicate a leak
Important:
Do not exceed low pressure, as higher pressure can damage sensors or seals. Ensure the intake system is properly sealed before testing.
3. Vacuum Leak Detection, Listening for Leaks

With the engine running, listen carefully for a hissing sound. A steady hiss often indicates escaping air. Use a length of hose as a stethoscope to help pinpoint the source of the vacuum leak.
4. Spray Method (Use With Caution)
Some people use carb cleaner or brake cleaner to locate leaks.
How it works:
Spray small amounts around suspected areas while the engine is running. If engine speed changes, a leak may be present.
Risks:
- Flammable chemicals can ignite
- Can damage sensitive components
- Less reliable than other methods
- Isolating the Leak
If the vacuum leak isn’t obvious, isolate sections of the system:
- Temporarily clamp vacuum hoses (use care to avoid damage)
- Monitor engine behavior or fuel trims
- If performance improves when a hose is clamped, the leak is likely in that circuit
Focus on:
- (PCV) system
- Brake booster line
- (EVAP) purge line
After Repairs
Once you’ve found and fixed the vacuum leak:
- Clear any diagnostic trouble codes
- Start the engine and verify smooth idle
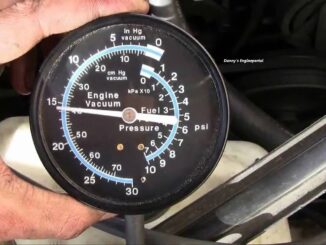
- Re-check fuel trims if you have a scan tool
Normal fuel trims should typically be within ±5% at idle.
Conclusion
Vacuum leaks can cause a wide range of drivability issues, but diagnosing them doesn’t have to be dangerous or complicated. Taking a systematic and safe approach will help you find the problem faster and prevent unnecessary damage.