It’s the weekend, you’re out enjoying a drive—and suddenly, your check engine light comes on.
Now you’re left wondering: what’s wrong with the engine?
The good news is that if your vehicle uses OBD1, you don’t need a scan tool to get answers.
With a little guidance, you can read the Honda OBD1 Codes yourself and get a clear idea of what’s going on.
What Your Check Engine Light Means
Before pulling codes, it’s important to understand what the light is telling you.
Condition 1: Steady Check Engine Light
A steady light usually means the issue is not immediately serious.
You can continue driving with caution if:
- The engine is running normally
- The car isn’t overheating
- The oil light is off
However, you should still diagnose the issue as soon as possible.
Condition 2: Flashing Check Engine Light
A flashing light indicates a serious problem—typically an engine misfire.
Symptoms may include:
- Engine shaking
- Poor throttle response
You should not continue driving in this condition. A misfire can quickly damage the catalytic converter and lead to overheating.
How Honda OBD1 Codes Work
Honda made it relatively simple to read OBD1 codes without special tools.
- 1986–1991 Honda / 1986–1993 Acura:
These models have a small LED window on the ECU that flashes codes directly. - 1992–2000 Honda / 1994–2000 Acura:
The LED was removed. Instead, the check engine light on the dashboard flashes the codes.
How to Retrieve Honda OBD1 Codes
Follow these steps:
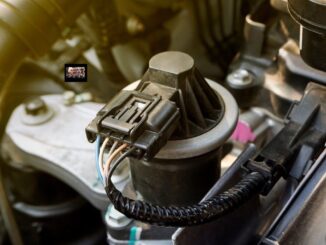
- Locate the factory diagnostic plug
- Usually near the ECU
- Found in the passenger-side footwell or under the glove box
- Identify the two-pin connector
- Typically contains a brown and black wire
- Jump the connector
- Use a paperclip to connect the two pins
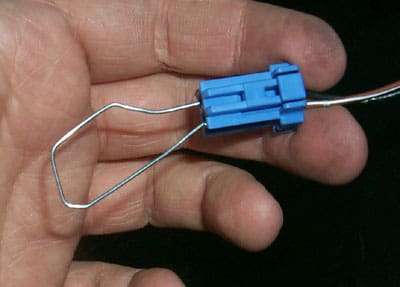
- Turn the ignition to the ON position
(Do not start the engine)
Now the check engine light will begin flashing codes.
How to Read the Flash Codes
The system uses two types of flashes:
- Long flash = 10
- Short (quick) flash = 1
Example:
- 2 long flashes + 3 short flashes = Code 23
Once you understand this pattern, you can decode any stored trouble code.
Common Honda OBD1 Codes
Here are some of the more common codes:
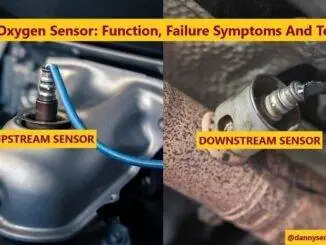
- 1 – Heated oxygen sensor (HO2S)
- 3 / 5 – Manifold Absolute Pressure (MAP) sensor
- 4 – Crankshaft position sensor (CKP)
- 6 – Engine coolant temperature (ECT)
- 7 – Throttle position sensor (TPS)
- 8 – Top dead center sensor (TDC)
- 10 – Intake air temperature sensor (IAT)
- 12 – Exhaust gas recirculation (EGR)
- 14 – Idle air control valve (IACV)
- 15 – Ignition output signal
- 16 – Fuel injectors
- 17 – Vehicle speed sensor (VSS)
- 21 – VTEC control solenoid
- 22 – VTEC pressure solenoid
- 23 – Knock sensor (KS)
- 43 – Fuel supply system
- 67 – Catalytic converter system
- 71–76 – Misfire detected (cylinders 1–6)
Note:
Code 0 and 11 may indicate an issue with the ECU itself.
How to Clear Honda OBD1 Codes
After repairs are completed, you can clear stored codes:
- Disconnect the negative battery cable
- Wait at least 10 seconds
- Reconnect the battery
This will reset the system.
Final Thoughts
OBD1 systems may be older, but they’re still effective for diagnosing engine problems. By learning how to read these codes, you can quickly identify issues and avoid unnecessary guesswork.
Keep in mind that some codes may vary by model, so it’s always a good idea to verify them with a manufacturer-specific manual when possible.