Replacement")
The engine coolant temperature sensor, is one of the most important engine management sensors in your vehicle.
So, a sensor that is shorted or reading out of range, can’t provide a reliable signal.
Consequently, engine coolant temperature sensor (ECT) replacements, usually happen only after they have failed.
Above all, the engine coolant temperature sensor, also known as the (ECT) sensor, is very important. It may be confusing but, I like to call it a monitor sensor. Because, it does not make any changes by itself. Consequently, it sends all its info the the (PCM ECM), where all the decisions are made.
While, its function is vital, all it really does is keep track of the changing temperatures of your engine coolant.
Engine Coolant Temperature Sensor (ECT), How Does It Work
First, the vehicle’s (PCM ECM) sends a 5 volt reference signal, to the engine coolant temperature sensor (ECT). Next, the resistance of that signal changes. And, is based on the temperature, of your engine coolant. So, its this resistance that the vehicle’s (PCM ECM) monitors, to get a correct reading of the coolant temperature.
So, when the engine coolant temperature is high (hotter). Then, the resistance is low. However, when the engine coolant temperature is low (cooler). Then, the resistance is high.
The vehicle’s (PCM ECM) uses this information, for any or all of the following control functions:
- Start up fuel enrichment, on fuel injected engines.
- Spark advance and retard.
- (EGR), during warm up.
- (EVAP) canister purge.
- Open closed loop feedback control, of the air fuel mixture.
- Idle speed, during warm up.
- Transmission torque converter clutch lockup, during warm up.
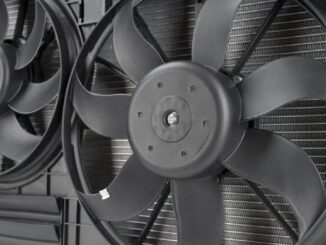
- Operation of, the electric cooling fan.
Hopefully, the above list makes you realize, the importance of this basic sensor.
Now that you know its importance, we hope you have confirmed that, it is or is not working properly. If you need to do any testing please read our blog. Engine Coolant Temperature (ECT) Sensor: Failure Signs: Testing. If your test was good, at least now you know what to look for in the future. But, a failed test confirms engine coolant temperature sensor replacement, is the next step.
Engine coolant temperature sensor replacement, is easier than you think.
Some steps and sensor locations may vary depending on the year, make and model of your vehicle. So, if you need more info, get a manual for your vehicle, as they are easy to find. And, because you already know you need a new sensor, you should get that first.
Almost every parts store has them, but I recommend you get a factory replacement from your local dealer. The biggest reason is you get what you pay for, and I would not skimp on something this important.
How To Replace, Your Engine Coolant Temperature Sensor (ECT)
1
- Park your vehicle in a safe place, where you can work easily and let the engine cool.
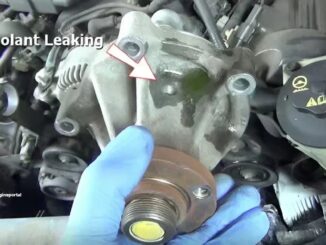
- Locate and slowly remove the cooling system pressure cap, to relieve the system of any residual pressure.
- Place a clean drain pan under the rad, to catch engine coolant.
- Open the rad valve and drain about, two to three quarts of coolant.
- You only need to remove enough, to drop the level below the sensor.
- Then close the drain valve. This will reduce coolant waste, when you remove the sensor.
2
- The next step is to disconnect the battery, but, before you do, read our post. Car Battery: Know What Can Go Wrong, Before You Disconnect It.
3
- You most likely know where the sensor is, because you already tested it.
- But, if not, locate and get access to it.
- You may need to remove the fan shroud or plastic engine covers, in order to get access.
- Depending on the engine, you may have to remove, part of the plastic air intake tubing.
4
- Disconnect the engine wiring harness from the sensor.
- A coolant sensor will be held in place, by one of two methods.
- The most common method is similar to, installing a spark plug. Use a deep socket and ratchet wrench to loosen the sensor.
- The less common method, is being held in by a large C clip. Use a pick to pull the clip upward and away from the sensor. This will enable the sensor to be, removed from the coolant access port.
5
- Clean the hole where the sensor is located, before you reinstall the new sensor.
- In some cases, dirt, debris, and other particles, will impact the function of the sensor.
6
- Compare the new sensor to the old one. Both should have the same configuration.
7
- Time to install the new sensor (Reverse Of Step 4).
- If the sensor uses threads, apply a small amount of (sensor safe) thread sealer to help stop coolant leaks.
- Note: Some sensors have sealer already applied.
- Check your manual, for proper torque specs.
- Do not over tighten the sensor or you will crack the porcelain and damage it.
- Some sensors are sealed by an O ring, which requires no sealer.
- Install the sensor, by inserting it back into the coolant access port and reinstalling the clip.
- After the sensor has been successfully tightened, reattach the wiring harness.
8
- Once the sensor installation is complete, install any other parts you had to disassemble. (Reverse Of Step 3).
- Close the radiator drain valve, and refill the system with engine coolant.
9
- Reconnect the battery, start the engine and make sure the (CEL) is out.
- Allow the engine to heat up, while adding coolant as needed.
- Reinstall the rad cap, once the engine is at operating temperature and recheck the system for leaks.
- Make sure you bleed the system properly, to avoid air pockets.
10
- Take a test drive, while monitoring the temperature gauge, to verify a completed repair.
- Make sure to drive the vehicle, until you hear the rad fan come on.
- We recommend rechecking the coolant level, after a few days of driving.
Conclusion
So, today’s engines monitor basically every function, to ensure your vehicle runs efficiently every day. Consequently, one of the most important systems to monitor, is the cooling system. And, it will alert the driver that a problem exists, by turning on a (CEL) on the dashboard.
BY DANNY BENDER