Engine bearing clearance is one of the most critical factors in proper engine lubrication and long-term durability.
If the clearance between the crankshaft and bearings is too tight or too loose, it can lead to low oil pressure, excessive wear, overheating, and eventually engine failure.
Maintaining the correct oil clearance ensures a stable oil film between moving parts, preventing metal-to-metal contact and allowing the engine to operate smoothly.
Engine bearing clearance is more important than most people realize. Let’s start with the basics.
Proper engine bearing clearance also plays a major role in maintaining oil pressure and overall lubrication performance.
What Is Engine Bearing Clearance?
Engine bearing clearance is the small gap between the crankshaft journal and the bearing surface.
This gap allows engine oil to flow between the two surfaces and form a protective film. This oil film supports the load of the rotating crankshaft and prevents direct contact between metal components.
Without proper clearance, this oil film cannot form correctly, leading to rapid wear and damage.
Why Engine Bearing Clearance Is Important
Proper bearing clearance directly affects:
- Oil pressure
- Oil flow
- Heat transfer
- Friction levels
- Engine lifespan
When clearances are correct:
- Oil pressure remains stable
- Bearings stay properly lubricated
- Heat is carried away efficiently
- Engine components last longer
When clearances are incorrect, lubrication breaks down and damage can occur quickly.
Symptoms of Incorrect Bearing Clearance
Incorrect bearing clearance often shows up as common engine problems:
- Low oil pressure
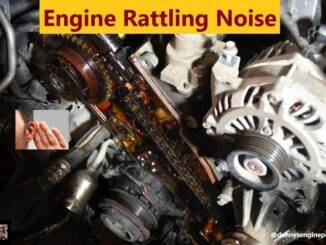
- Engine knocking or tapping noises
- Excessive engine vibration
- Overheating components
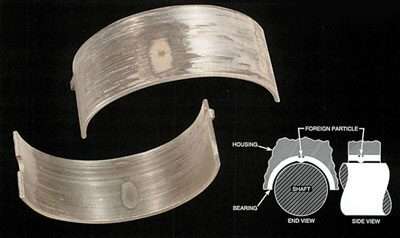
- Metal particles in engine oil
- Premature engine wear
Many of these symptoms are often mistaken for ignition or fuel-related issues, which can lead to misdiagnosis if the lubrication system is not considered.
General Rule for Oil Clearance
A commonly used guideline is:
- 0.001 inch of clearance per inch of journal diameter
Example:
- 2.00-inch crankshaft journal = 0.002-inch bearing clearance
This rule provides a starting point, but actual clearance depends on several factors.
Factors That Affect Bearing Clearance
Tighter Bearing Clearance
- Smaller crankshaft journals
- Lower viscosity oils (0W-20, 5W-20)
- Smooth surface finishes
- Precise engine machining
- Higher operating temperatures
Looser Bearing Clearance
- Larger journals
- Higher viscosity oils
- Rougher surface finishes
- Slight misalignment in engine components
- Increased oil flow requirements
Important:
Oil flow increases rapidly as clearance increases. Even a small change can significantly affect oil pressure and lubrication performance.
Oil Flow and Pressure Considerations
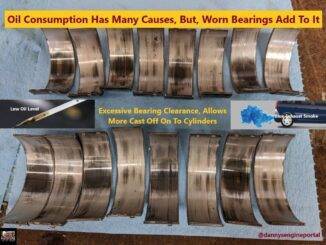
As bearing clearance increases, more oil escapes from the bearing.
If the oil pump cannot supply enough volume to maintain pressure, oil pressure drops and lubrication becomes insufficient.
This is why proper bearing clearance is critical for maintaining a stable oil system.
Modern Engines and Oil Clearances
Modern engines are designed with:
- Tighter bearing clearances
- Lower viscosity oils (0W-20, 5W-20)
These combinations help:
- Reduce friction
- Improve fuel economy
- Enhance cold-start performance
However, older engines or performance builds may require different clearances and oil types to maintain proper lubrication.
Excessive Bearing Crush

What Happens
Excessive bearing crush occurs when the bearing is forced too tightly into its housing, causing it to deform inward.
Common Causes
- Filing bearing caps
- Over-torquing fasteners
- Incorrect shim thickness
Result
This distortion creates uneven pressure on the bearing surface, leading to premature wear and possible failure.
Insufficient Bearing Crush
What Happens
When there is not enough crush, the bearing becomes loose in its housing.
Common Causes
- Dirt or debris during installation
- Improper torque
- Worn or oversized housing bore
Result
A loose bearing reduces heat transfer and allows movement, causing overheating and damage.
How to Measure Bearing Clearance (Plastigage Method)
Plastigage is a simple and effective way to measure bearing clearance.
Steps:
- Remove the bearing cap and clean all oil from surfaces
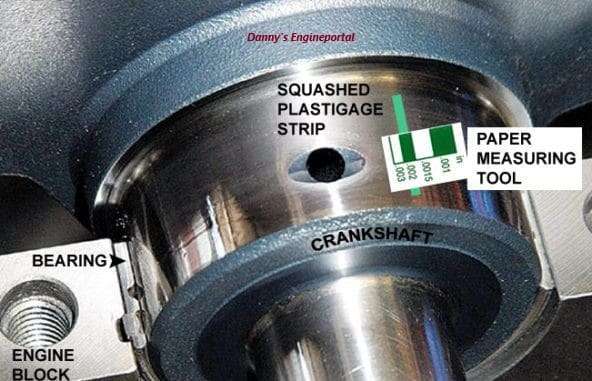
- Place a strip of Plastigage on the crankshaft journal
- Reinstall the bearing cap and torque to specification
- Remove the cap again
- Compare the flattened Plastigage to the scale on the package
This measurement shows whether the clearance is within specification.
Repeat the process for all bearings to ensure consistent results.
In Summary
Engine bearing clearance is not just a measurement—it is a key part of how the oil system protects your engine.
If the oil film cannot be maintained, metal-to-metal contact will occur, leading to rapid wear and failure.
Ensuring proper bearing clearance helps maintain:
- Stable oil pressure
- Effective lubrication
- Long engine life